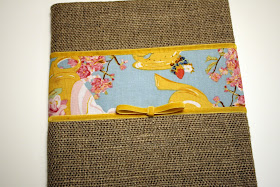
Here is the Journal Cover Tutorial. It is super easy to make and the design options are endless. You can also make book covers for the kids school books!
I hope you enjoy!
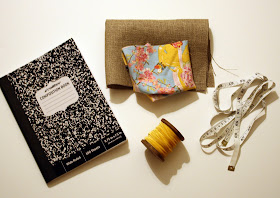
What you will need:
A book or journal, measuring tape, embellishments if adding any, and fabric.
Step 1: Measure you book and add 2" to the length and width.
Step 2: Cut out you fabric to the new measurements and add any embellishments. For mine I sewed on the fabric strip first than added the ribbon to the top and bottom edges by top stitching along both sides.
Step 3: Finish edges.
Use a zigzag stitch to finish all edges. I increased my width to give it a nice finished look.
Step 4: Put the fabric on your book and fold fabric along straight edges.
Step 5: Remove fabric and iron along the folded edge of the top and the bottom wrong sides together.
Step 6: With the top and bottom folded over you will now fold the other 2 ends towards the right side and iron flat.
Step 7: Sew a stitch using a 1/8" seam along the outside of the corner the length of folded fabric. This should only be about 1".
Step 8: Flip you corners out and slide journal in.
I hope you find this handy;)


This is so cute! I wish I was able to sew that little ribbon on like that! I'm still learning how to sew straight. LOL
ReplyDeleteNice! I love this- and so simple. Thanks so much for sharing the tutorial.
ReplyDeleteThis is so simple and looks easy. I like the guided pictures and will try it soon.
ReplyDeleteI made one out of orange/purple/red/yellow canvas for my Spanish class binder. It is so neat the teacher asked for one, I put a strap on it and a velcro tab to keep it closed.
ReplyDelete