HOME ABOUT ME PATTERNS/TUTORIALS FEATURED CONTACT ME

Wednesday, December 18, 2013

Pillow Case to Market Tote Turtorial

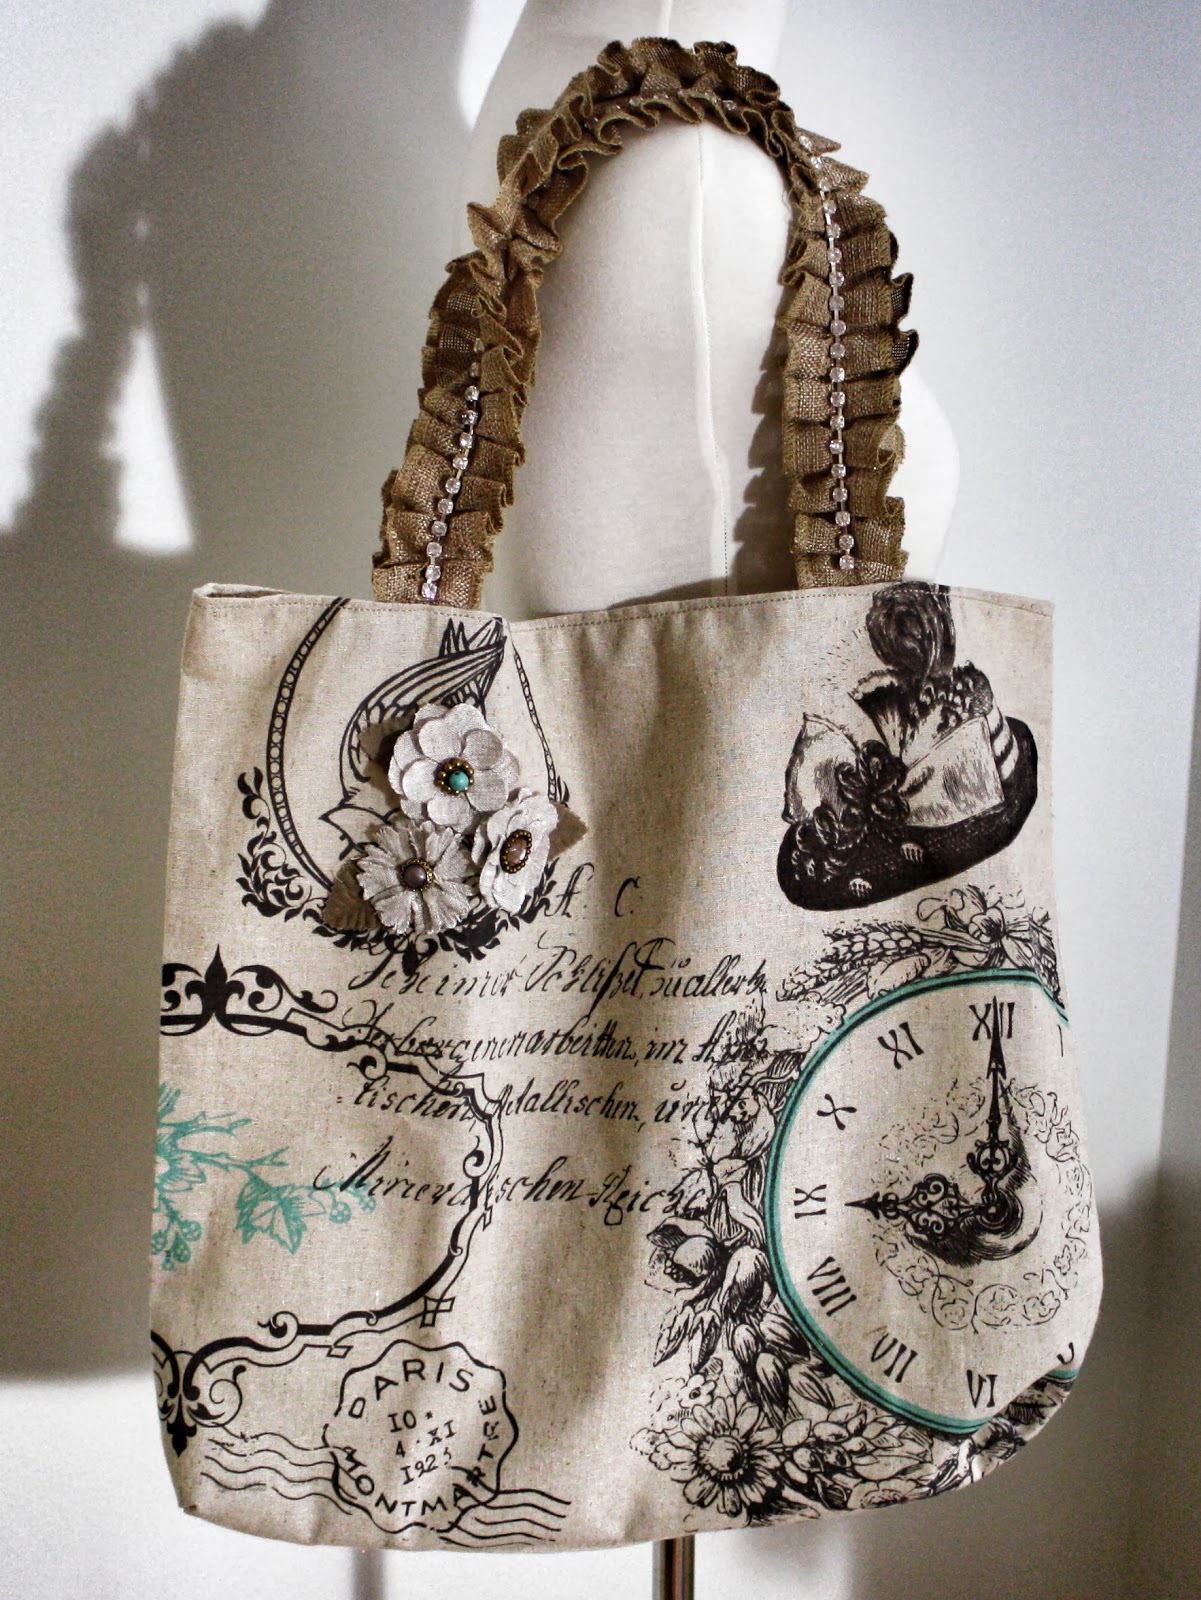
This Christmas I wanted to make market totes for friends and family but I am strapped for time so I needed something that I could whip up quickly.  It was important to me that they still be beautiful and well made however.  This is what I came up with.


Here is a quick tutorial if you want to make your own Market totes.

What you will need:

Pillow cover:  I purchased these burlap like covers from Hobby Lobby for $5.99-$6.99 and was able to use the 40 % off coupon.  


Pre made flowers or fabric scraps to make your own flowers:  I purchased some pre made flowers and decorative grommets to add to my homemade flowers from Hobby Lobby.  I chose to do homemade flowers with most to keep the cost down.  

Trim for straps: The ruffled burlap with diamond trim came from Hobby Lobby, you can use any durable trim.

Good glue:  I use E6000 anytime I'm gluing fabric.


Step 1: Open the zipper and flip the cover inside out.  Using a seam ripper, carefully pull out the seam along what you want to be the top of the tote.

Step 2:  Cut off the side housing the zipper about an inch along the entire side or bottom removing the zipper and cutting a seam along the entire side that is even.  Keep the zippers!  You can reuse them!

Step 3:  Sew the side where the zipper was removed using a 1/2" seam allowance. I surged all the sides for extra reinforcement since these are designed for the market but that's not necessary.


Step 4:  Create the bottom corners by pinching the side seam down to the bottom seam and stitching across about 1.5" from the corner.  This will square off the bottom corner.


Step 5:  Create the top seam. Since I was going for the rustic look I serged along the rim then folded over and ironed flat. For a cleaner look or if you don't have a Serger then you will want to fold over and iron the top 1/4" then fold over another 1/4" and iron flat. This will give the top a clean finished look.


Step 6:  Pin and sew straps in place.  I didn't take enough photos on this but after you pin your straps to the wrong side you will want to sew them in place using a double stitch or making two stitch rows so they will hold up when weight is added to the tote.


Here is a picture of the top finished with the trim sewn to the inside of the tote.


Step 7: Top stitch along the entire top rim.


Step 8:   Add flowers, bows or anything else you feel is beautiful to the front using the E6000 glue or hand stitching them in place.


To make flowers:  I took fabric scraps and frayed them and used vintage lace and trim scraps to make my flowers. I make flowers by adding a gather stitch then while I pull the thread and gather I work the fabric in a circle.  To hold it all together I put it under my machine for a quick stitch in the center.  If it didn't come out the exact shape I was looking for I hand stitch it to shape it a bit.  I then took off the metal grommet parts of my decorative grommets and glued the decorative front of the grommet to the middle of the flower.  My goal was quick and rustic chic so there was no need for perfection with these totes. If you are interested in more details on making flowers This is a great tutorial and the flowers are beautiful!


I hope this  tutorial allows you an easy way to bless loved ones with your gift sewing!


Merry Christmas Pin It

Monday, December 9, 2013

From the garden to the table.

We are back in a season of having food to harvest from the garden daily. This is what makes gardening so addictive for me and keeps me moving along in our plan to turn our 150' by 60' front yard into a completely edible landscape. The more food we harvest and eat the more food I want to plant. Snacks like roasted radish disappear as busy hands walk by and grab a few as a snack leaving me back in the garden planting hundreds of seeds so we can have these delicious snacks everyday!

Sweet potato rings, fresh eggs, grapefruit, and orange juice. A common breakfast this time of year.


These are luffa gourds.


The garden is still in the early stages of soil fertility but the food is growing. I use an all wood chip covered garden plan and work in chicken compost, worm compost, and follow the permaculture idea of chop and drop to increase soil fertility. I'm not sure if it's the best method and I know there is debate on wood chips but we grow food, alot of food considering I started this garden just a year ago and don't water or use any synthetic fertilizer or pesticides.

green beans, oregano, peppers, eggplant, romaine lettuce, icicle radish, cabbage.
Oregano and green beans.
Broccoli, collard greens, lemon grass, and tea roses.
Luffa gourd ready to harvest.
butterfly plant covered in aphids keeping the aphids from harming food.

Super sized navel oranges.

It's hard to tell the oranges from grapefruit.

Cooking is not my favorite activity so the things I create with our food are simply no recipe meals but they are still delicious!

Roasted radish; cut radish and oregano, coat with olive oil, cook 425 until lightly brown.
Cow peas cooked in with quinoa.

quinoa with herbs, parsley, onion, tomato, and broccoli.  A garden medley.

Roasted peppers, potatoes, and sausage.

Happy gardening!


Job 12:8 Or speak to the earth, and it will teach you;
And the fish of the sea will explain to you
. Pin It

Saturday, November 16, 2013

Making Memories


It has been awhile since I have taken the time to share our lives. Mostly do to a season of busyness but with some recent illness we have been able to slow and enjoy the fall season, our home, and each other on a more intimate level.


This summer as we finished our fireplace I was certain I would be going all out with fall decor. I enjoyed reading and viewing lots of other blogs with beautiful inspirations and was ready to run out and stock up but then something changed in me. I'm not sure if is just a side effect of life with young children and everything this home of ours requires or if it is something deeper but either way my heart changed. I no longer desired turning my home into something from a magazine but instead felt I needed to go outside and bring in what autumn in our area truly had to offer. I made the dried floral arrangements from my flower stash.


This change has been a theme with me lately. I originally purchased this English antique plate rack to decorate with items that would "decorate" our home. As you can see, now it's decorated with books and notes from my children. I couldn't love it more!

The kids have also started working on Christmas decorations and gifts. Nate made the Christmas tree ornament on his own and daddy and Mason made this cottage that will be decorated as a Christmas cottage and displayed in the house. This was all Mason's idea but I was so excited when I returned from errands and found what he made. I have the perfect vintage Christmas supplies to help him make this the Christmas cottage he is envisioning.


Aside from all that we continue to garden and harvest foods weekly. I'm anxiously awaiting my string beans, snap peas, and brocoli!


That's it for our life on a little urban homestead right now. Time together making memories......


Pin It

Monday, October 28, 2013

Fall Outfits.


We recently went on a little mom and kids retreat to the mountains to enjoy the changing season and I whipped up some fall attire for the kiddos. It's one of my favorite seasons to sew "matchy matchy" clothes for the kids.


It's not my best sewing work but I got it done in time and they looked so sweet together. I used a pattern I created that is my go-to for Madeline's dresses these days and for the boys there was only time for a simple pant. The embroidery design was downloaded from Embroidery library and although I don't enjoy doing machine embroidery work, it did make the dress perfect for the season. The front apron was made from a vintage crochet curtain.

A perfect trip creating memories with friends and my little ones.
Pin It