HOME ABOUT ME PATTERNS/TUTORIALS FEATURED CONTACT ME

Thursday, February 14, 2013

The Garden Grows

Even though it's not officially spring yet, it has felt like it here lately and it has renewed in me a spirit of planting.  Not only in the garden but in the life of this home.  Homeschool work is back in full swing, seeds are being put in the ground daily, and changes are happening in how we eat and prepare food as we slowly start to grow our little homestead.  It's all a learning curve but one that draws me closer to God as I watch the miracles around me.


The biggest challenge in our organic garden is the strawberry patch.  It feels like a loosing battle with bugs and birds taking the best of the berries before we can get them.  I'm not giving up yet but it's a large space and I could be producing lots of other edibles that could do well in that spot.  In our decorative beds I have been planting edibles among the flowers.  In the rose garden there is an artichoke plant that will be the center focal point, oregano, lambs ear, and beans and cabbage that have not yet started to sprout.
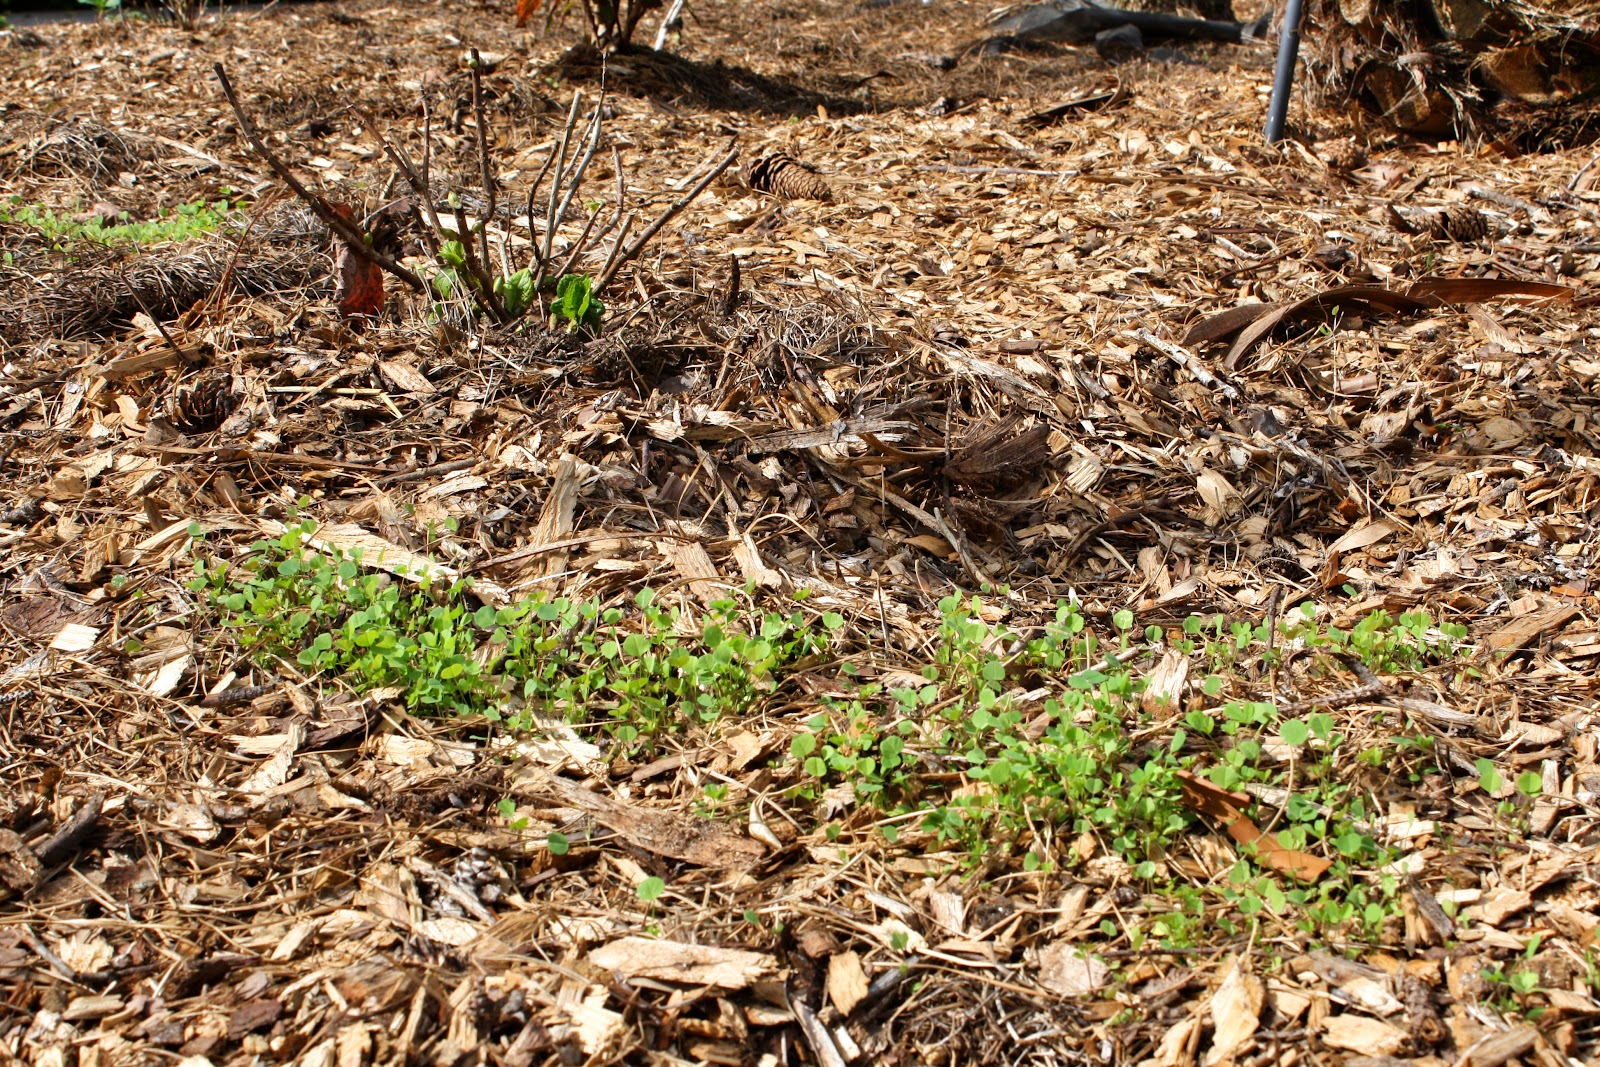

Here you can see the alfalfa sprouts have started to grow.  I put these in to try out green fertilizer since alfalfa is known to have nitrogen fixing characteristics.  It's also really nutritious for humans and animals and easy to grow. 


The ladies are producing eggs so rich that it looks like I add mustard to my egg salad.  In the whiskey barrel I planted potatoes.  I started with 6" of soil and added more as the potato sprouts broke through the soil.  I took this photo 2 days ago and since then the top has exploded with beautiful full leaves.


This tiny pepper plant has over 30 blooms which makes me wonder why organic green peppers cost so much at the store.


The garden is growing.  Both the actual garden and the plants in it.  The past 2 weeks it has been a mad rush to get the beds prepared and the seeds planted in order to get the most out of this growing season.  It gets hard some days when I'm putting work in and not getting a lot of food out but it also amazes and motivates me to watch a seed so tiny I can barely see it become something so big and beautiful right in front of my eyes. 


This is my compost set up for fruit from the fruit trees that spoils, chicken manure, and yard leaves.  The rest goes to the chickens as scraps or to the vermiculture bins.


The boys are always finding fun ways to help as well.  They go fishing while I work in the garden and we feed the fish to the chickens.  It helps cut down on the cost of feed since organic feed is so expensive and I believe is the reason our egg yolks are so yellow and rich lately.  It makes my little hens really happy too.

We still have a long way to go but I can finally see how we can produce a lot of the things we need with ease and oh how I love spending my days with these beautiful children enjoying the beauty God has provided. 

Psalm 104:14  He makes grass grow for the cattle, and plants for man to cultivate bringing forth food from the earth Pin It

Sunday, January 13, 2013

Companion Garden Beds

I finally started on the front yard companion garden design.  I have had analysis paralysis for 2 years with this project and decided it was finally time to just go for it and work on the aesthetics along the way.  When we purchased our home the front yard had been cleared of all trees and had become nothing but weeds.  It's a large front yard and after receiving a mind blowing quote to have sod laid, I decided it was better to put it to use for our family by creating an edible landscape with minimal grass. 


It's hard to see the size in these photos but as it stands it is about 30 feet wide and 25 feet deep.  I plan to make it a little larger and add a few more small boxes to give it some more layers.  The hubby will also be making a long arbor that goes most of the width along the side closest to fence for growing grapes.  It will help give it that English garden feeling that I'm going for.  It will all be framed out with stacked stone borders and boxwood hedges when it's finished.  I also plan to add butterfly gardens to corners so that it has lots of color and will attract bees and butterfly's to pollinate. 


The tree in the middle of this photo is an olive tree and on the far left and right sides of the garden I planted apple trees.  All 3 sit inside the garden space that will be framed so I plan to keep these trees pruned to a small ornamental size so they offer some light shade in the summer and help give the garden a little more interest.  There will also be flagstone walking paths throughout. 


My boxes are nothing special.  They are made from cedar fence post so the cost was minimal.  I chose not to invest too much into the boxes because ultimately they will not be very noticeable.  Since this is companion garden there will be several heights and layers of plants and the boxes will just add a hint of interest in the midst of what will hopefully be an abundance of big beautiful vegetables. 

I have lots of planned companions like Borage next to my tomatoes, peas next to my potatoes, yarrow and garlic around borders to deter bugs, and many more but most of it will just be trial and error.  To prepare the ground I laid down paper bags and put a thin layer of wood chips down.  We have a tree company that drops off wood chips when they are in the area.  I try to mulch my bottom layer with rich material from the bottom of the pile that is already breaking down.  I put a few inches of top soil on top of the wood chips and then work in a layer of rich chicken compost.  I top it off with another thin layer of wood chips.  It will take time but eventually it will all become rich, light weight compost that will hold water naturally.  In the meantime I will keep adding fresh compost and growing plants that add nutrients to the soil like peas and bean sprouts.

That's it for now. It's not much to look at yet but it's a start!


Pin It

Monday, December 31, 2012

Handmade felted doll


Meet our sweet new friend Valarie.  This is one of my handmade favorites this year.  I came across this pattern on Etsy by accident and fell in love!  I have 3 more in production now. 


The pattern also came with a little stuffed toy rabbit for Valarie, a purse, jacket, and shoes.  I made Valarie for Madeline and felt those items would be lost.  I can't wait to finish another one with all the accessories.  The pattern is excellent!  It is well written and very easy.  It would make a great pattern for young girls.  It's all hand sewing and supplies are minimal. 


I made a few mistakes with the eyes.  I used 100% felted wool, found at Hobby Lobby, and it fell apart a little.  Next time I plan to use a wool blend for the eyes.  I was also able to find 100% wool fabric at Joanne's and felt it in the washing machine for the main body which made this project much more affordable than the recommended Etsy store sources for felted wool.  The rest was made out of synthetic felt and it still came out super cute.  I can't wait to get started on more of Gingermelon's sweet dolls.  Pin It

Friday, December 14, 2012

Handmade gifts and such.

I feel like it's been forever since I last posted and I was thinking it's because I haven't been doing anything creative.  The past few weeks I have really felt the daily work load of directing a Classical Conversations group, violin lessons twice a week, art classes, and all the other work that comes with keeping up a home and educating little ones.  Most of it has finally come to an end until next year and when I sat down and thought about what I have done creatively over the past few weeks, I realized I have accomplished quite a bit in the midst of our busy schedule.

I need to touch up the walls still.


I changed things up a little in the homeschool room.  I really needed a dry erase board to help me focus on a few key things during the week.  I didn't however want the room to look to much like a classroom so I ended up painting some black Pottery barn frames that I already had with an antique finish and putting maps from Ballard design in them.  I used a sheet of scrapbook paper for the middle one with notes for violin practice.  I also hung the violins to make practicing daily easier.  I like how it turned out.  It's much more functional and still feels like a home instead of a classroom. 


For our Classical Conversations Christmas party, Tony cut wood discs so the students could make Christmas ornaments.  I love having a handy husband!  It was fun and they turned out great. 


We have started renovations on our new family doll house.  I wish it was vintage but it's not.  It is however in need of a huge makeover which is exactly what I was looking for.  We found it on Craigslist and Nate went to work on the electrical problems right away.  This will be a fun project we will enjoy as a family for many months.  I have been wanting to do a dollhouse renovation ever since I first saw my sweet friend Corey's doll house collection.  If you love vintage you should check out her site.  She is absolutely amazing!


 I whipped up a nook cover for a Christmas gift and started painting this vintage chair I found.  It doesn't look like much but I love this chair!  Notice the slats on the bottom for holding books?  I have a special plan in mind for this lovely chair so I'm hoping to finish it up over Christmas break.  The flowers are for a wreath I'm creating for the front porch. 


I hope you are having a wonderful time with your family this Christmas season!  Pin It

Saturday, November 24, 2012

Little French Dress for sale.

Sorry it has been so long.  My Classical Conversations community doesn't end for the holidays until next week so it has been a busy time preparing for company, violin and art lessons, and school!  Next week we finish up and I'm ready to spend the month of December creating all the things I plan to give as Christmas gifts this year and enjoying time at home with the kids without the pressure of getting school work done. 


The boys have been busy creating decorations for the Holidays.  They made a couple scarecrows for Thanksgiving and started on bird house ornaments with daddy today.  They turned out really cute.  They have a tree in their room this year and I'm a little jealous of how nice it's looking filled with handmade ornaments.  I'll post pics soon........


Yep, that's my Mason.  It took lots of bribery to make this happen but I needed to check my sizing on someone! 

He ended up making the best of it and did a little modeling for me.  They are never going to forgive me for this when they get older!  Nate had to try on a few as well.......hehe....

I've also decided to sell a few French dresses this month.  I need to clear out some fabric to make room for new fabric and I'm raising money for a program to help me make more professional sewing patterns so I can share this super cute pattern I created with everyone.  The sizes I will be selling will be 12months to 6-7.  They will most likely be one of a kind since I'm creating from my stash and all the fabric will be designer quilt fabric.  Nothing from Joanne's or other discount fabric stores.  I will post more soon!  I hope you had a blessed Thanksgiving! Pin It

Monday, November 12, 2012

Little Fall Dress


It has been a busy time around here.  Projects, Fall fun, and more projects.  I'm also still working to correct the Little French Dress pattern.  I made Madeline the 3T-4T size out of some of Heather Ross's linen fabric with a light pink vintage lace at the bottom.  I love this fabric but I feel like the dress needs more vintage lace and some pockets.  It is also a little big on her which means my sizing is just about right for this pattern.  


The weather here is amazing.  Warm and breezy one day and cold enough for a fire the next and as much as I love teaching my children and watching their minds and hearts grow with books I know the real lessons come from exploring God's gifts in nature so during this time of year we let God teach.  Pin It