HOME ABOUT ME PATTERNS/TUTORIALS FEATURED CONTACT ME

Tuesday, March 29, 2011

Book or Journal Cover Tutorial

Here is the Journal Cover Tutorial.  It is super easy to make and the design options are endless.  You can also make book covers for the kids school books!


I hope you enjoy!


What you will need:

A book or journal, measuring tape, embellishments if adding any, and fabric.


Step 1:  Measure you book and add 2" to the length and width.

Step 2:  Cut out you fabric to the new measurements and add any embellishments.  For mine I sewed on the fabric strip first than added the ribbon to the top and bottom edges by top stitching along both sides. 


Step 3:  Finish edges.

Use a zigzag stitch to finish all edges.  I increased my width to give it a nice finished look.


Step 4:  Put the fabric on your book and fold fabric along straight edges.


Step 5:  Remove fabric and iron along the folded edge of the top and the bottom wrong sides together.


Step 6:  With the top and bottom folded over you will now fold the other 2 ends towards the right side and iron flat.


Step 7:  Sew a stitch using a 1/8" seam along the outside of the corner the length of folded fabric.  This should only be about 1".


Step 8:  Flip you corners out and slide journal in.


I hope you find this handy;) Pin It

Sunday, March 27, 2011

Good Stories and a Journal Cover

I've started a journal for each of my children.  It's my way of staying connected with them individually.  It's easy for me to get busy and put them all in the same box forgetting that they learn, love, and need differently.  A journal forces me to not just think of our day and what we did but of our day and how that day affected each of my children.

I created this one for Madline.  It's made from linen burlap and I covered a composition book.  There is just something about a composition book that makes me feel like I'm accomplishing something;)


I went to a book seminar this week that was put on by Jan and Gary Bloom.   It was a lot of fun shopping knowing that anything I picked was already carefully selected and worth reading!  I found a few wonderful books for the kids and purchased a copy of Jan's book for myself.

I don't know much about good children's literature.  I've gotten lucky over the years and by reading reviews and taking the time to read the books before I purchased them we have ended up with what I think is a great early children's library in our home.  Of course I would like it to grow and grow and grow, preferably at the rate of my children, but for now I can't complain.  Here are some of our newest books.  I'm absolutely in love with the Dan Frontier series written by William Hurley & illustrated by Jack Boyd!  It's about Dan's adventures in the early west. 


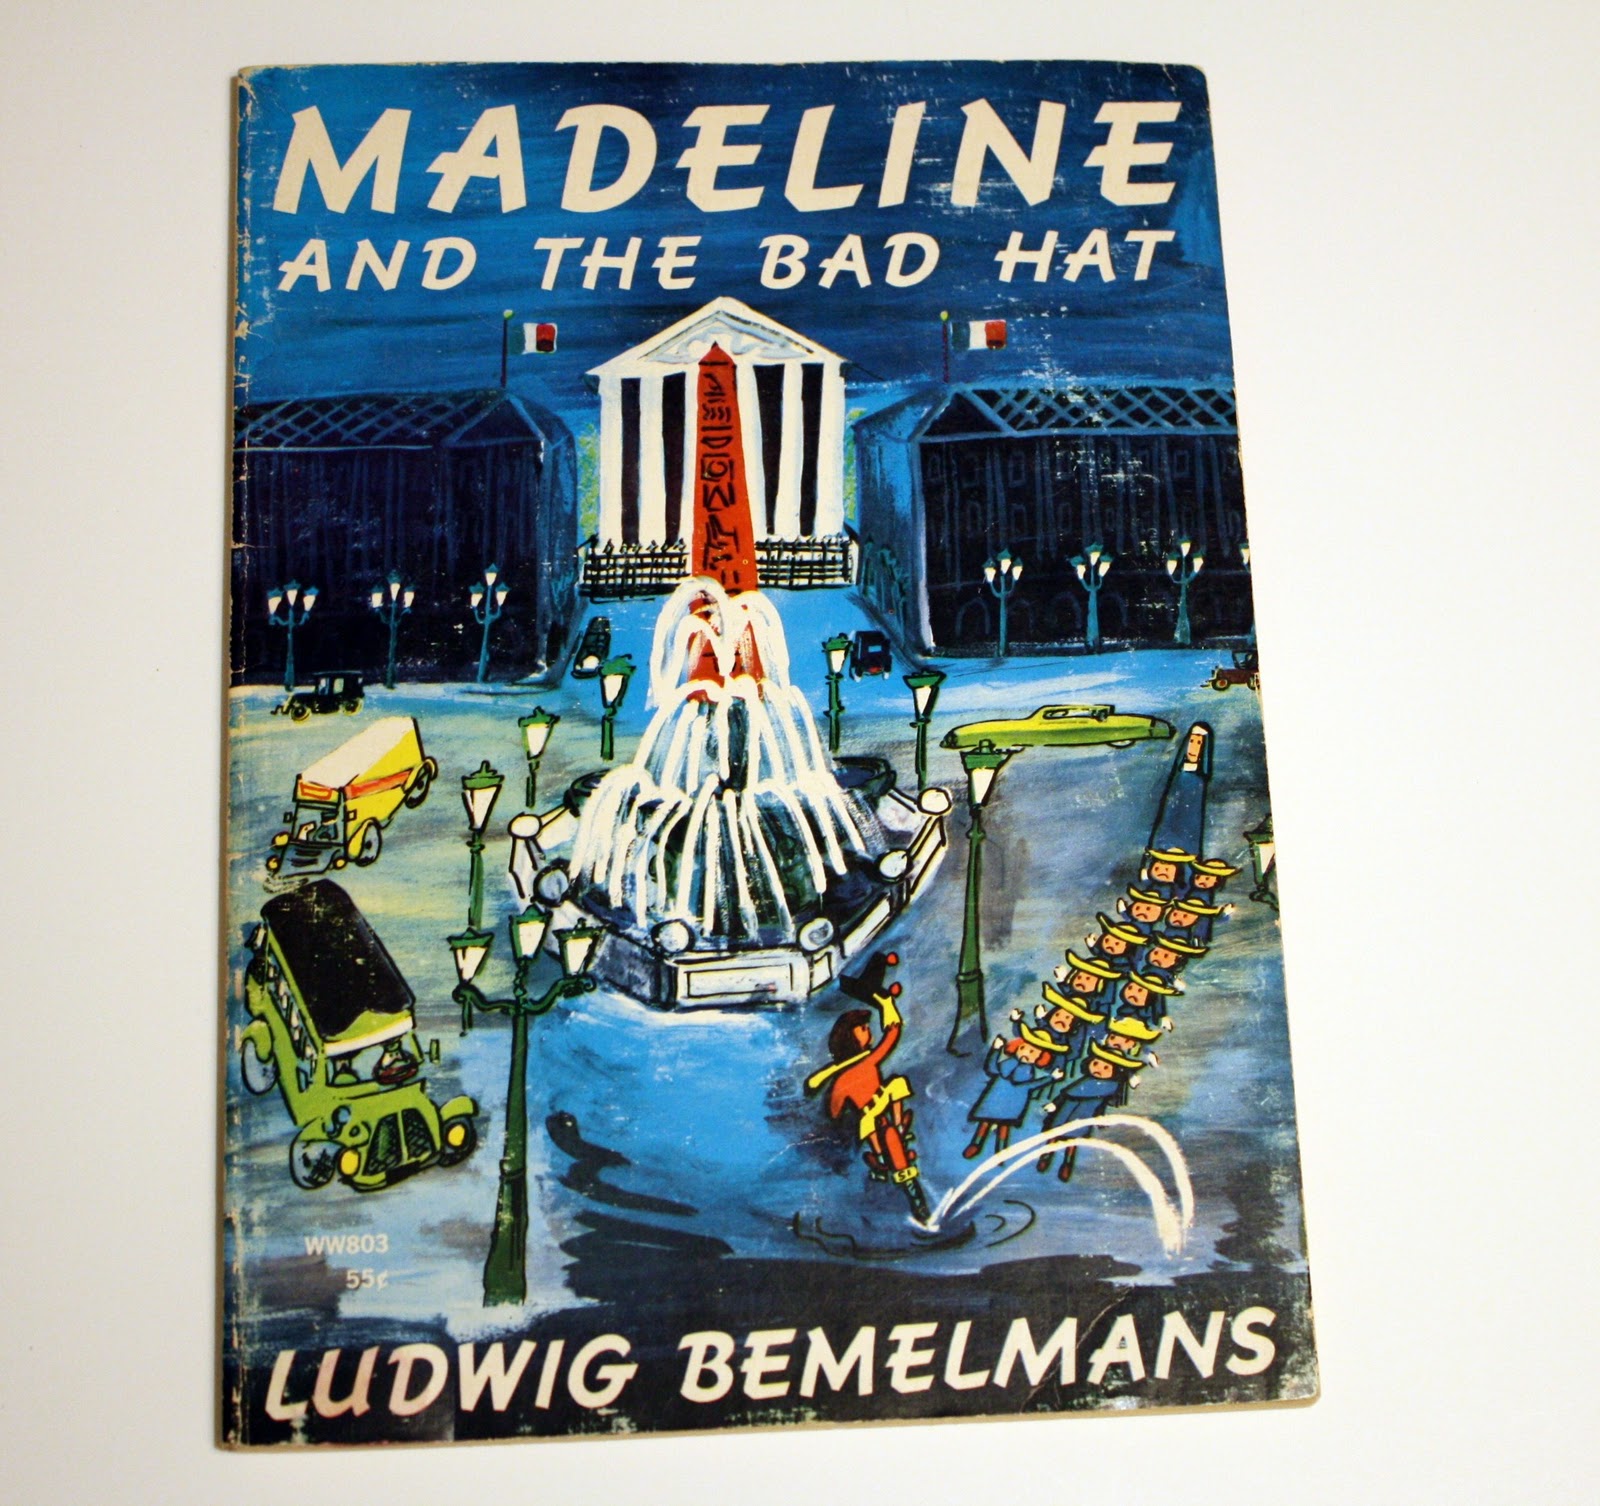
I've always loved the Madeline books written by Ludwig Bemelmans.  I often wonder if his Madeline character was a source of influence in me choosing our baby girls name.  It was a name that came to me the minute I new we were meant to adopt.  Hmmmmm?


I also purchased Jan's book Who should We Then Read?.  I really love this book.  It's a book of good authors of the past.  She does a fantastic job of breaking it down into age group and categories and tells each author's story.  She also told us a little bit of info that has stuck in my mind and given me a little motivation to pick up a book daily!  If you read 15 minutes a day you will read over a million words in the next year.  Huh.  I might actually feel like an adult again instead of a kindergartner if I take on that challenge!


I'm so glad I attended this seminar.  It reminded me that our journals should not just be facts but stories of our lives.  When we are gone our things won't matter and pictures will sit in boxes but the stories of our lives together will be the gifts that stay with our children and get passed on. 


Pin It

Tuesday, March 22, 2011

Little Chick

Here is the little chick with a makeover.  I know some of you are probably thinking, "what did she do to that poor little bird?!"  but he now fits perfectly in our home so I'm happy. 


Before

After

I decoupaged over his previously decoupaged body with this piece of Anna Griffin paper.  I have always loved this print!  You can find it in a fabric here.  He's cute I suppose;)  Time is limited right now and I need to have my hands in something crafty to keep me sain, even if the project is small and a bit pointless.  I added a little brown paint and beige glaze to age him. 

He tried out several places around the house. 

He spent some time near the birds next.


He hung out on the fireplace looking out the window.


He sat on the piano sadly wishing someone would play for him.  No one ever did.


And lastly he found his way to my bedroom dresser where he ultimately had to turn his back on my messy unmade bed.


I think his place will be on the family table for Easter brunch which means I've made a least one thing in preparation! 


Are you preparing for Easter yet? Pin It

Friday, March 18, 2011

Anna Maria Horner Sunsuit

So I finally finished the sewing project I gave you a glimpse of on my last post.  It's a sunsuit for the baby girl and I love how it turned out.  It's so sweet and super easy to create!  Rae, over at made by rae, posted this sunsuit tutorial shortly after Madeline was born and I have been dying to make it ever since! 


I used Square Dance Voile fabric by Anna Maria Horner.  It is a super light super soft fabric that reminds me of silk but without the hassle.  It's so beautiful in person and perfect for hot summers! 


I mixed the voile with a Jersey double stretch knit on top and added fabric covered buttons on the back.  The best thing about these sunsuits is when they get to small you can cut off the bottom and uncross the straps to make a top that will fit well into the toddler years.  I also used some scraps to make a headband.  My girl has got crazy hair these days and needs the extra help right now;)


If you are unfamiliar with shirring, which is how the top of this sunsuit is made, here is a quick description on how I do it.  You can read more detailed shirring tutorials over at craft stylish and pretty ditty .

I sew my garment together first then load my bobbin with elastic thread by hand without adding tension.  Next I increase my thread width a little, and starting at the side seam sew 1/2" rows using a straight stitch.  I back stitch a few extra stitches than I normally would when I start and finish and this holds the elastic in place really well.  The more rows you sew the smaller the garment will get.  It's important that you stretch the fabric as you sew each row other wise you will end up with pleats instead of shirring.


Stretch fabric while sewing.


Before stretching shirring out. 


Stretch fabric while sewing.


Inside view.
Pin It